
I used margins on the screen to make sure I had a structured alignment for my text box's, which suited the structural, sophisticated style I wanted to create with my double page spread. I ensured I un-ticked the 'Hyphenate' box at the top of the screen, so that the wording was more attractive and looked more professional.
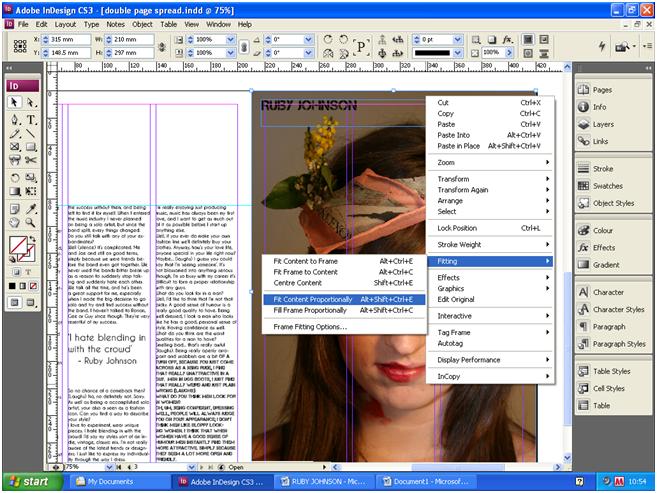
When placing my image into InDesign, I went to 'File' the clicked 'Place', and once the image was loaded into the InDesign document I clicked 'Object' and then 'Fitting' and selected 'Fit Content Proportionally'. I filled up a whole page with this image, because the structure looked simple, but the use of an image meant the reader wouldn't be overwhelmed by too much text, and the close up image was quite captivating, and appealing for the reader.

When changing the fonts I simply clicked on the font drop down button on the tool box at the top of the page. When selecting a fonts, I chose one which wasn't overly sophisticated, but instead one which was simple, but quite feminine, so would be appealing for my target audience of girls aged 15-19.
 I placed a quotation from the text in the middle of the text because it's done in a lot of music magazines such as NME and Q, and I wanted to use this music magazine convention to make my double page spread look realistic. I made the text for this quotation slightly bolder and in a larger font so it would stand out.
I added extra margins horizontally on the top and the bottom of the text box to ensure the alignments were even, and the structured look I was aiming for was there. I did this by going to the lined and numbered measurements line, placed below the tool box. I simply clicked on this, then dragged the mouse down to were I wanted to place the margin, and it appeared where I wanted it to.

I used the margins which I placed either side of the text box and an alignment to where I could place border lines for decoration, I did this by clicking on the shapes tool, placed on the left hand side text box. After drawing the rectangle in alignment with the margin, I changed the width and colour so they matched. I went through the same process to create the vertical border lines next to the heading.
No comments:
Post a Comment